YOU WILL NEED THESE PROGRAMS
MS PAINT aka PAINT
and AT LEAST Adobe Photo Shop 7 (the latest version works too)
I know photoshop is at least up to CS but I am old school and chose not to become acquainted with the latest version, so bear with me for as far as I know the controls are about the same. If other programs allow this it should work as well.
FIRST, You want to go into paint and get a document prepared to save as this is going to be the base for what you will use to print your images.
SAVE THIS DOCUMENT. I saved it as 576384, but name it however you want. This will be the base for where you copy and paste your images to print out for your photo card. I use 4x6 photo paper.
IF THIS GETS CONFUSING YOU CAN ALSO USE THESE INSTRUCTIONS.
Free Instructions -- How To Edit Bottle Cap Images as its what I used.
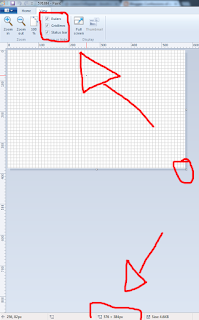 Save this and minimize for later. Now go find an image you want. any image, I am going to use this image for example.
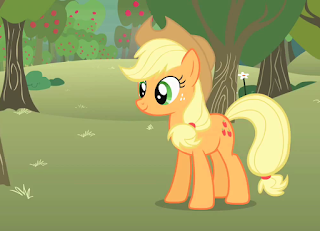 Keep in mind if you manage to find an image with no background or it fills the picture completely that is ok too.
 Lets take Apple Jack here and open up photoshop!
FIRST STEP IN PHOTOSHOP: Open your preferred image. NOTICE how on the right there is a lock on the image? This may or may not happen with your image. IF IT DOES here is what you can do.
Right click on the image, and chose duplicate image.
That will bring up this box, don't worry about naming it just click OK.
That will duplicate the image, as shown here. What you want to do is delete the original image so we can do on to the next step.
IF YOUR IMAGE DOES NOT SHOW A LOCK DISREGARD THIS STEP. IF photoshop WILL NOT allow you to do this, open the image in paint and save it to ANOTHER FORMAT such as PNG, OR JPG then open the other formatted picture in photoshop and it should work this time. Sometimes GIF formats do not let you duplicate the image at all.
As shown/circled you want to click what may show as a rectangle, hold the left mouse button down over it to bring the drop down menu for that particular icon and chose the "Elliptical Marquee Tool" which will show up as a circle. That will form a circle. To get a perfect circle when forming hold down the alt + shift keys while doing this and do not release until you are done forming your circle as shown here.
It may take a few tries to get it right, you want to try and encompass as much as you can of the image without going outside the borders. OR if nothing else at least focus on the face so that the character is recognizable. As shown here its not a perfect fit but that is ok I kept trying.
Once you have your circle at the right size and where you want it to be, click the images option and chose image size.
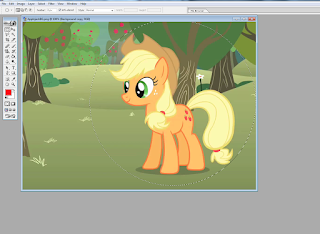
The image above this is goofed if you can tell, the circle went out of border for the picture, this is what you want to avoid. Now go to layer option at the top, click "Add Layer Mask" then click "Reveal Selection"
This is what happens, it removes the rest where the circle is not, and viola!
THE NEXT step, go to the Image section click "Image Size" This window comes up, what you want to do is click "constrain proportions" so that when you go into enter the size it will automatically constrain for you.
As you can see in this one I changed the top one to the current number of 1.050 I didn't have to type the second zero as photo shop will already recognize it as a 50. Also change the "Resolution" section to 120 for better resolution. For me as I am using a fiskars 1 inch diameter hole punch where you can line it up and SEE how its going to come out before cutting it this helps. And also because of how my particular printer comes out, i need the extra diameter besides one inch. It may vary per program or millimeters. You will want at least .030 extra millimeters for BOTH width and height.
This is the finished product! It doesn't seem like it but it is the right size.
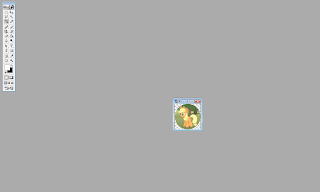
HERE IS the part where if you have an image that takes up the entire canvas, this is how you change that.
Using the aforementioned Apple Bloom Picture here is how you add more space so that a circle CAN be made to gain your image.
Go to the Image tab, and click "Canvas Size"
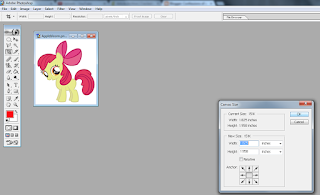 This box pops up, and you want to just make it bigger. The image specs say 1.825 and 1.958 you want to just add a bit more, I put in 3 for both.
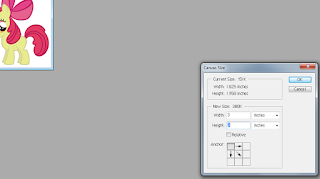 Unlike the image you do not want the arrows to be in the corner you want the canvas increase for all around.
Here the dropper is highlighted, go to the double squares near the bottom (that are currently filled with white,) click it, and it brings up the color spectrum.
I suggest choosing a background color because with the magnets and bottle caps white will yellow over time and even more so with the glue. Plus when about to apply them to the canvas before printing a color back ground prevents overlapping images when placing.
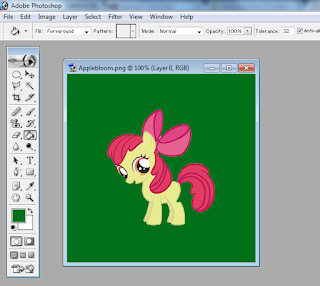 I chose green, click the tipped paint bucket and click on the white areas to fill in the blank. And viola! NOW you can take the steps as shown above to gather your image!
To save on blog length here I will make this easier, and also refer to the tutorial link above,
How to edit bottle cap images
and follow them.
THIS is where the pre-sized saved paint file comes in. OPEN two paint windows. In one open your pre-sized saved file, in the other window open your saved bottle cap images. Copy, then go to the other window and paste. If you want several of the same image paste again and drag the image over and move it. You can do about three rows of four for this. If you plan to print more of these later DO SAVE these as separate files for easy printing later.
For the mini stones, when getting the image its better to try and get the face of the character than the whole body as its going to be a small image. When changing the image size go to
.075 that way it will fit the smaller stones..
Hope this has been helpful! Let me know if I forgot any steps of if you have any advice!
This ties in with how to make the magnets. You can use the fiskars whole puncher or cut out with scissors.
Thank you for reading and let me know if you have tried this and how successful this went or if it didn't go as it should have.


No comments:
Post a Comment